Creating Your First Backup Set
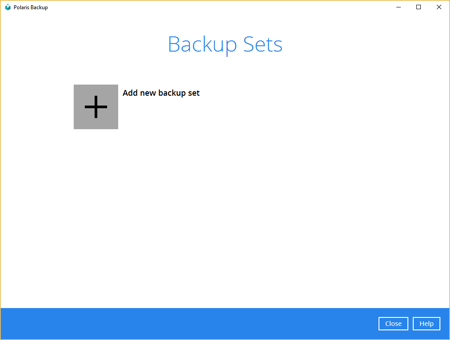
Step 1.
Click on Backup Sets and then Add New Backup Set.
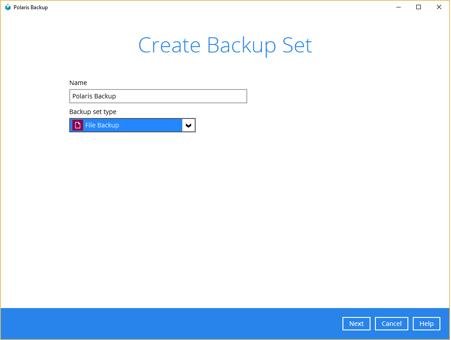
Step 2.
Give the backup set a name and select the type of backup you wish to set up. This can be a normal file backup to Exchange Server, SQL Server or even a full server backup image. For this example we will be setting up a file backup.
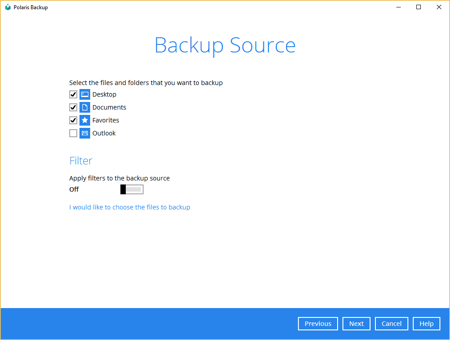
Step 3.
Select your source files that you wish to backup. Click on 'I would like to choose the files to backup' to get more options on which files you wish to select.
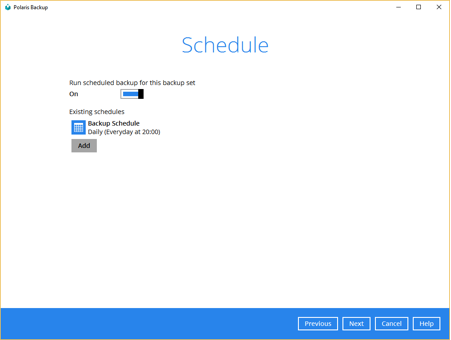
Step 4.
Select your backup schedule. The default backup schedule runs at 8pm daily, you can change this to suit your needs.
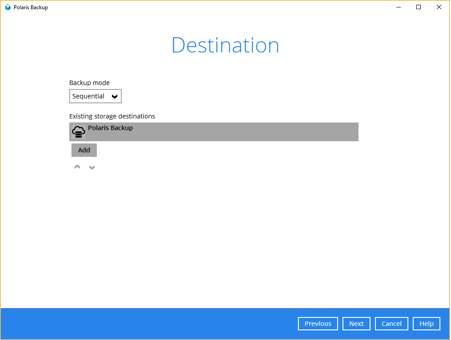
Step 5.
Select where you would like to backup your files to. The Polaris Backup datacentre is selected by default for any new backup set. You can also select to backup to a local hard drive if you wish to do so. This gives you the option of having both cloud and local backup solutions.
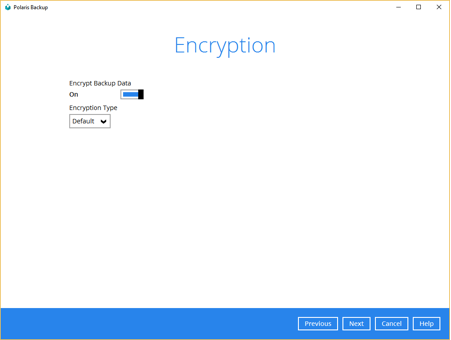
Step 6.
Select the level of encryption you wish to use. The Encryption screen allows you to change the level of encryption to suit your needs and also to change the encryption password. It is strongly recommended that you change the default password to one that you can remember, this key will prevent anybody else from being able to access your data.
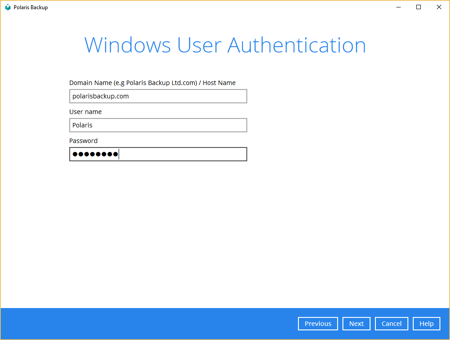
Step 7.
Enter suitable credentials to allow the Polaris Backup client to backup your data.
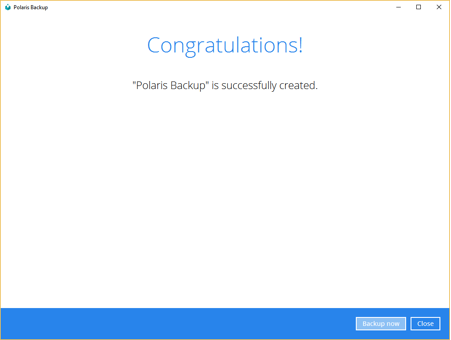
Step 8.
Congratulations, you have a backup set in place. Polaris Backup can now protect your data.